
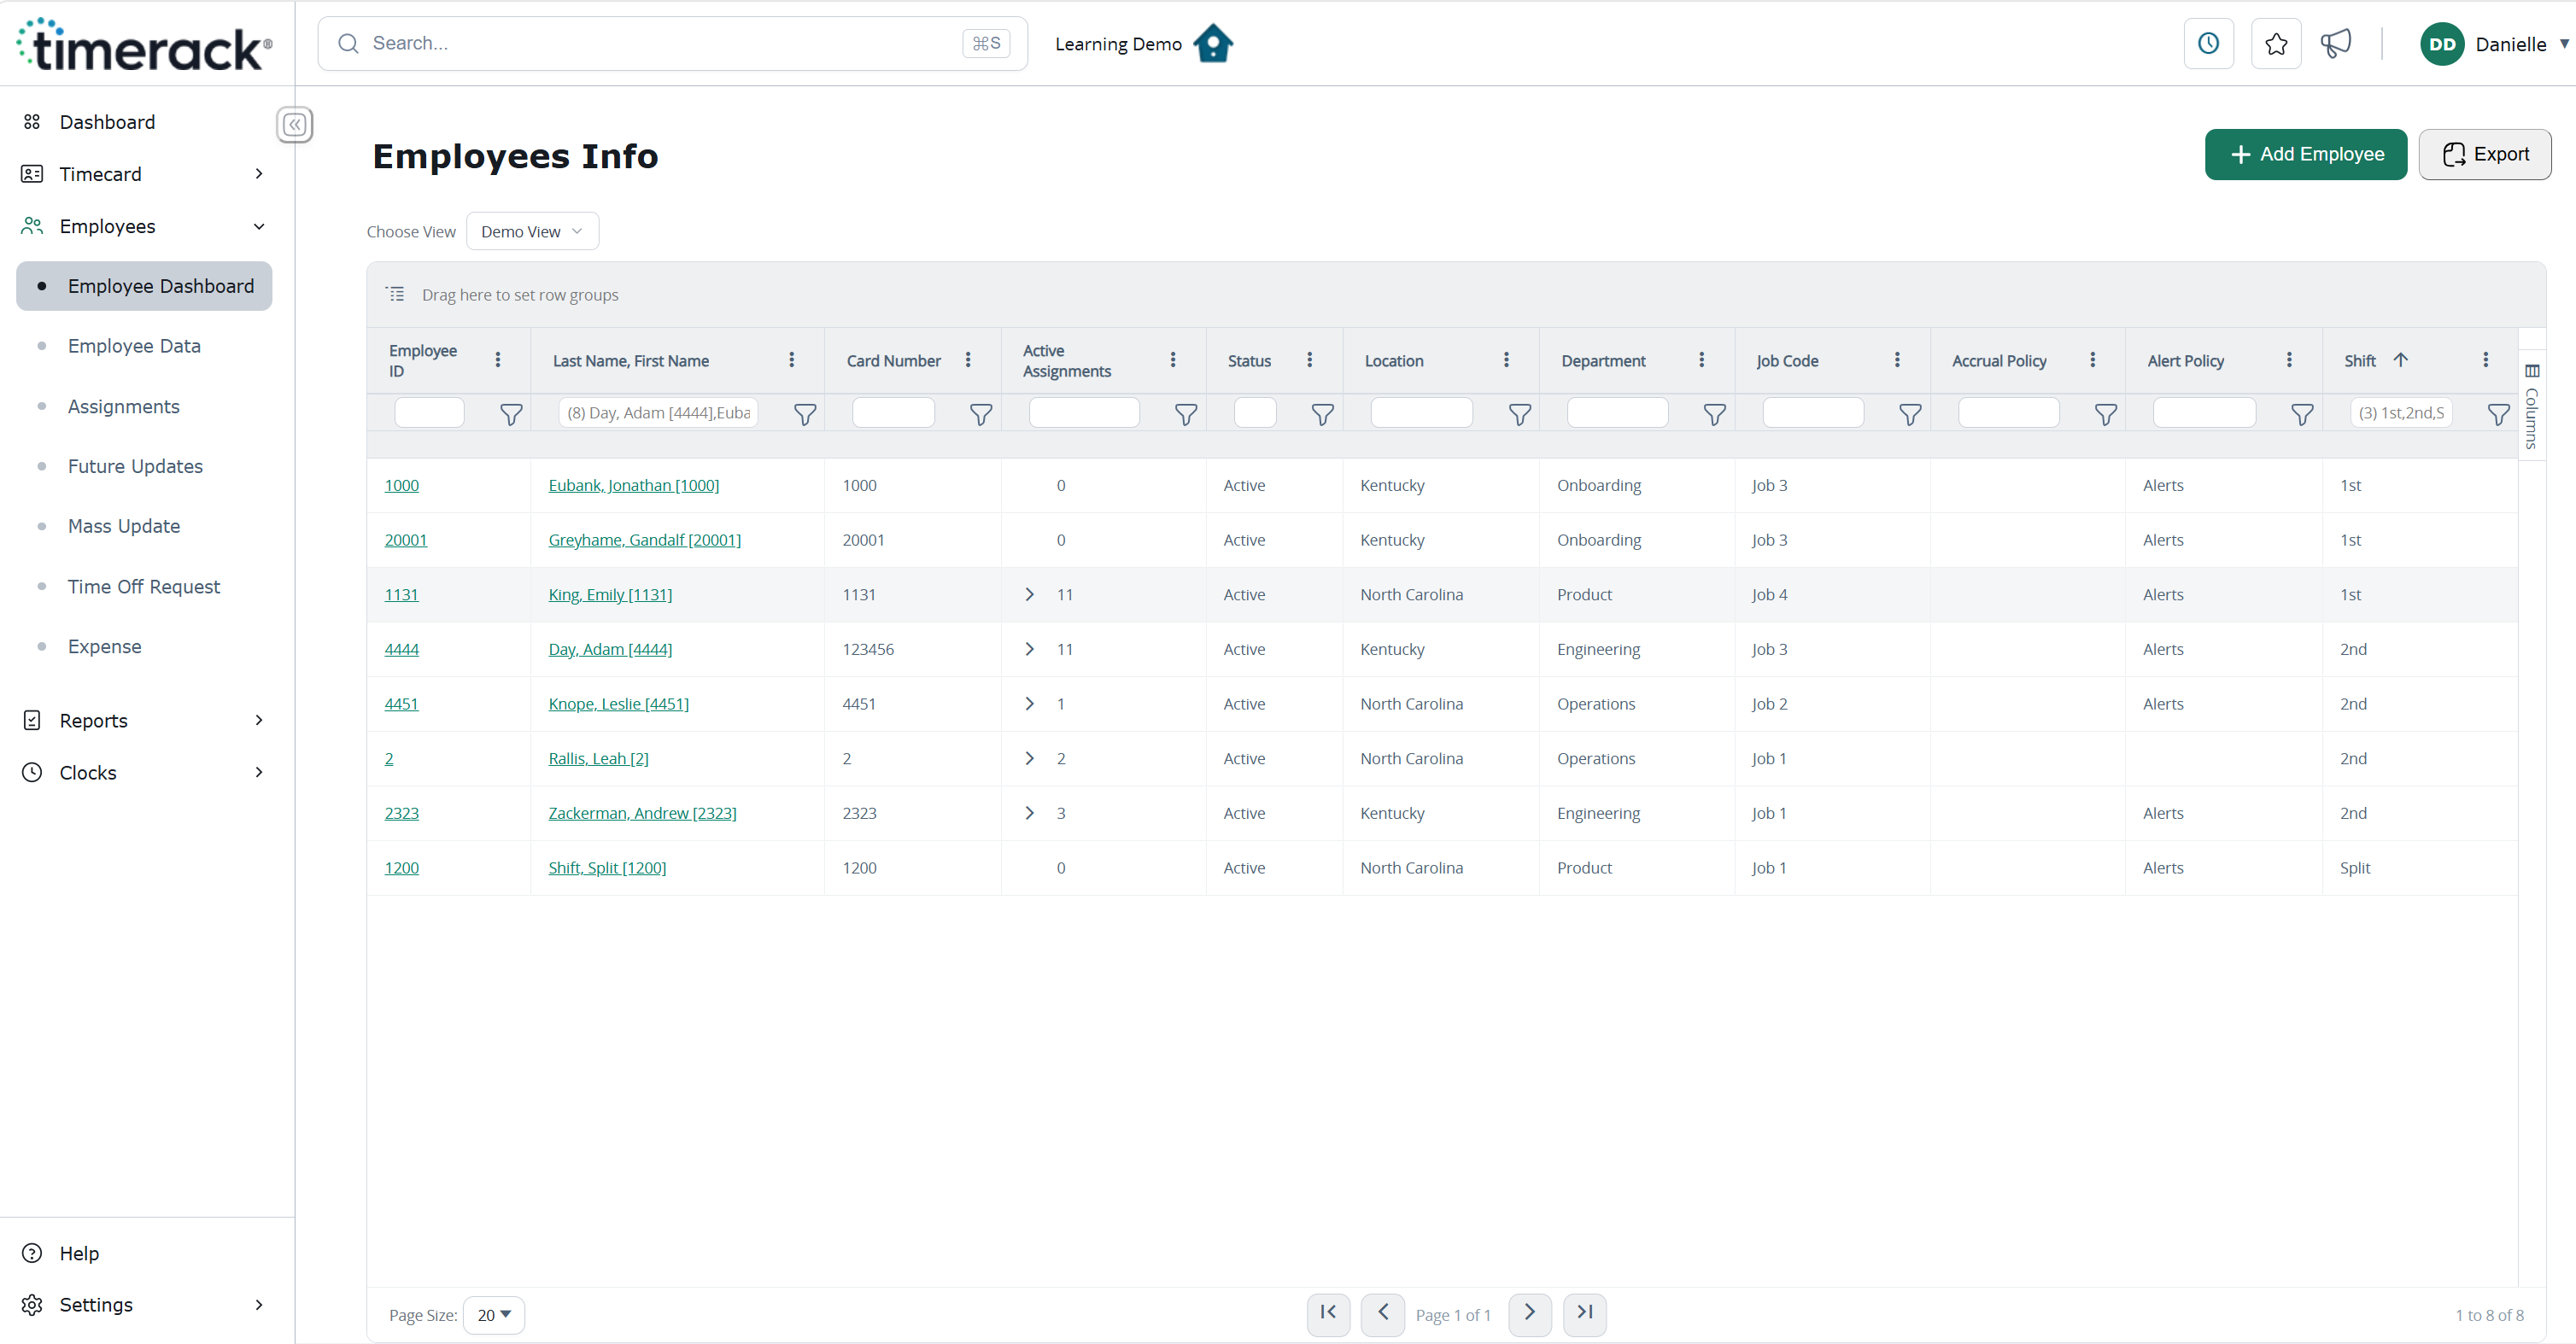
Timerack's new Employee Dashboard gives users a centralized, customizable view of their full employee list. Built on a flexible grid system, the dashboard allows users to filter and sort columns, choose which employee information is displayed, and save views for quick access to the data they use most. Dashboard data can also be exported as a CSV file for additional reporting or analysis.
This article explains how to use the Employee Dashboard. Watch a walkthrough video HERE.
Access the Employee Dashboard
Open the dashboard from the Portal
1. Log in to the Timerack portal.
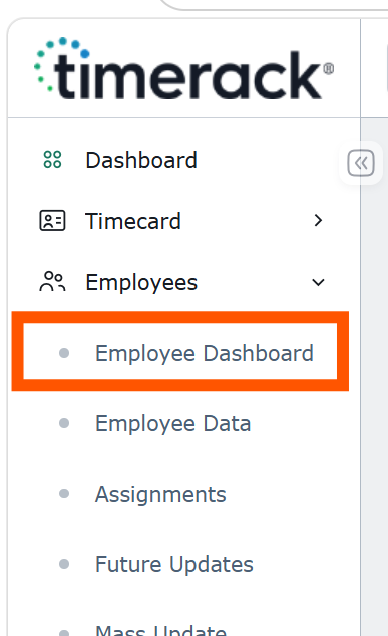
2. Select Employee in the navigation menu on the left-side, then select Employee Dashboard.
The dashboard loads with a grid view of the full employee list, showing employee-related columns such as Employee Name, Employee ID, Status, and Department by default.
Filter and Sort Columns
Narrow and organize the employee list.
1. Click the filter icon in any column header to display filter options for that column.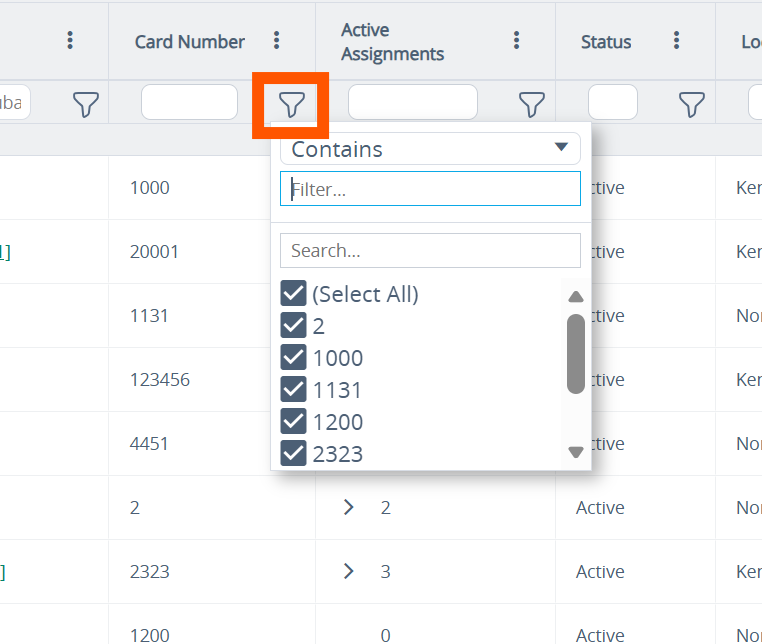
2. Select the criteria to filter by.
3. To sort the columns, click the triple vertical dots and the sorting options will be displayed.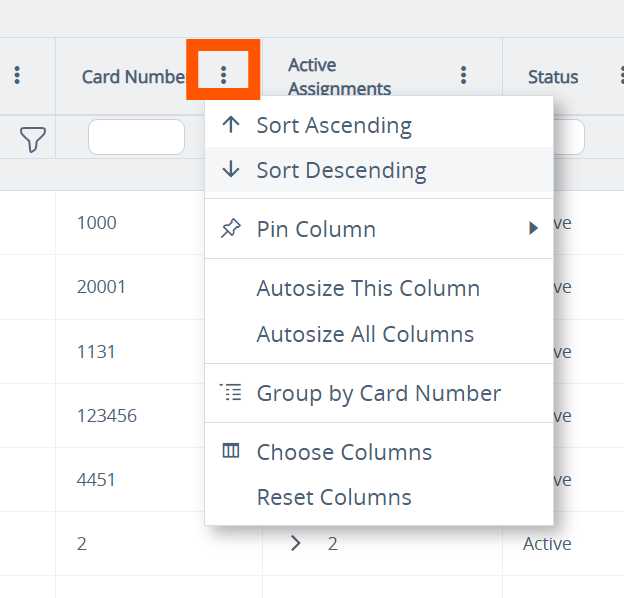
Filters can be applied to multiple columns at once to narrow the employee list to exactly the records needed.
Customize Displayed Columns
Choose which employee information appears in the grid.
1. Click the Column icon (located in the upper right of the grid).
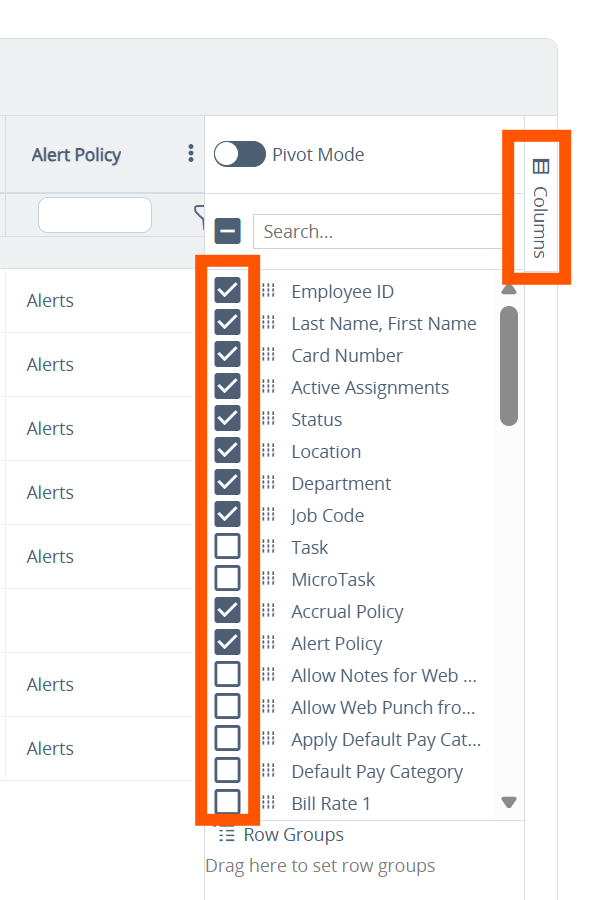
2. Mark the checkbox next to each column to show or hide it in the grid.
Changes to displayed columns are reflected in the grid immediately.
Save a Dashboard View
Save custom filter, sort, and column settings for quick access.
1. After setting up the filters, sort order, and columns you want, click Save As New View.
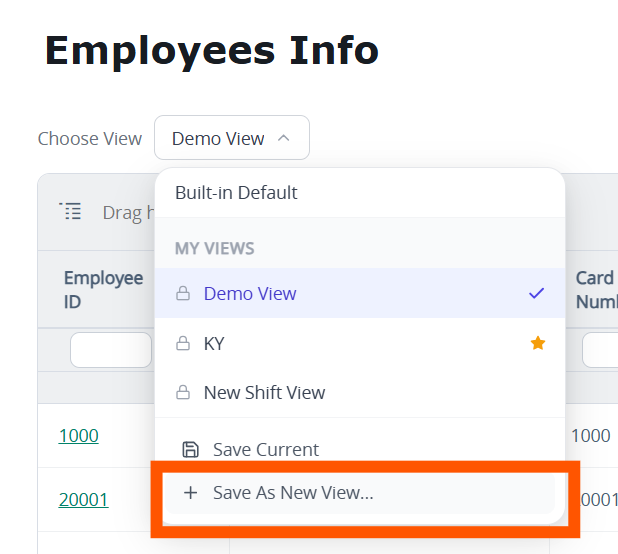
2. Enter a name for the view, choose whether it will be a Private view (visible to just you) or a Global view (visible to other users in your organization), then click Save View.
3. To load a saved view, select it from the Choose View dropdown menu.
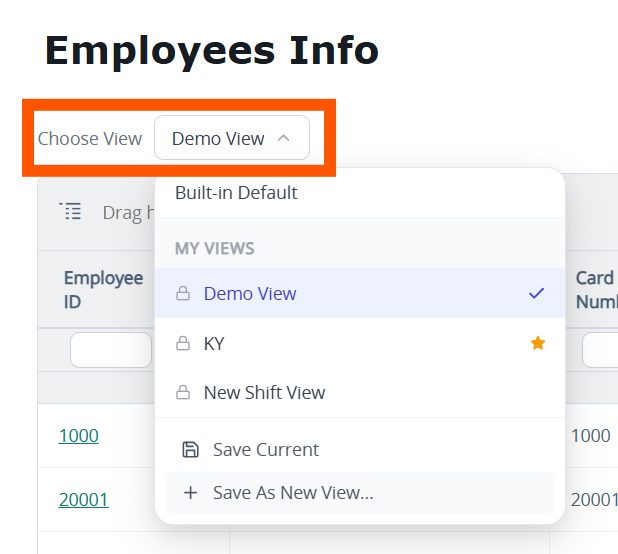
Saved views can be updated at any time by adjusting the grid and selecting Save Current.
Export Dashboard Data
Export the employee list as a CSV file
1. Set up the dashboard grid (filters, sorting, and columns) to reflect the data you want to export.
2. Click the Export button, located in the upper right of the page.
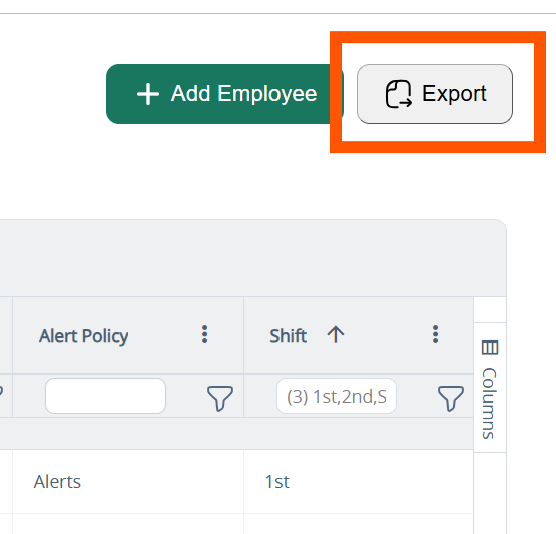
The file will download to the user's device and can be opened in a spreadsheet program for additional reporting or analysis.